
I've been going to my esthetician for over 4 years now for my lash extensions and if there is anyone I trust with my face, it is her! I've followed Katie to 3 different places now! She recently opened her own business called The Art of Beauty. It is located in Columbia, IL which is a suburb on the east side of the St. Louis metro area. Over the last couple of years, she's been tempting me with microblading. Every time I see her work on Instagram, it kept convincing me I needed this in my life. At one of my lash fill appointments in June, I told her I was finally ready to take the plunge! The thing about Katie is that she is amazing and her schedule is booked! I legit have my lash appointments booked out for a whole year just to ensure I get them scheduled at the times I need. One whole year out! So even though I told her in June I was ready for my brows, I knew it would be a few months before it actually happened. Plenty of time to mentally prepare! My appointment was booked for October 11th.
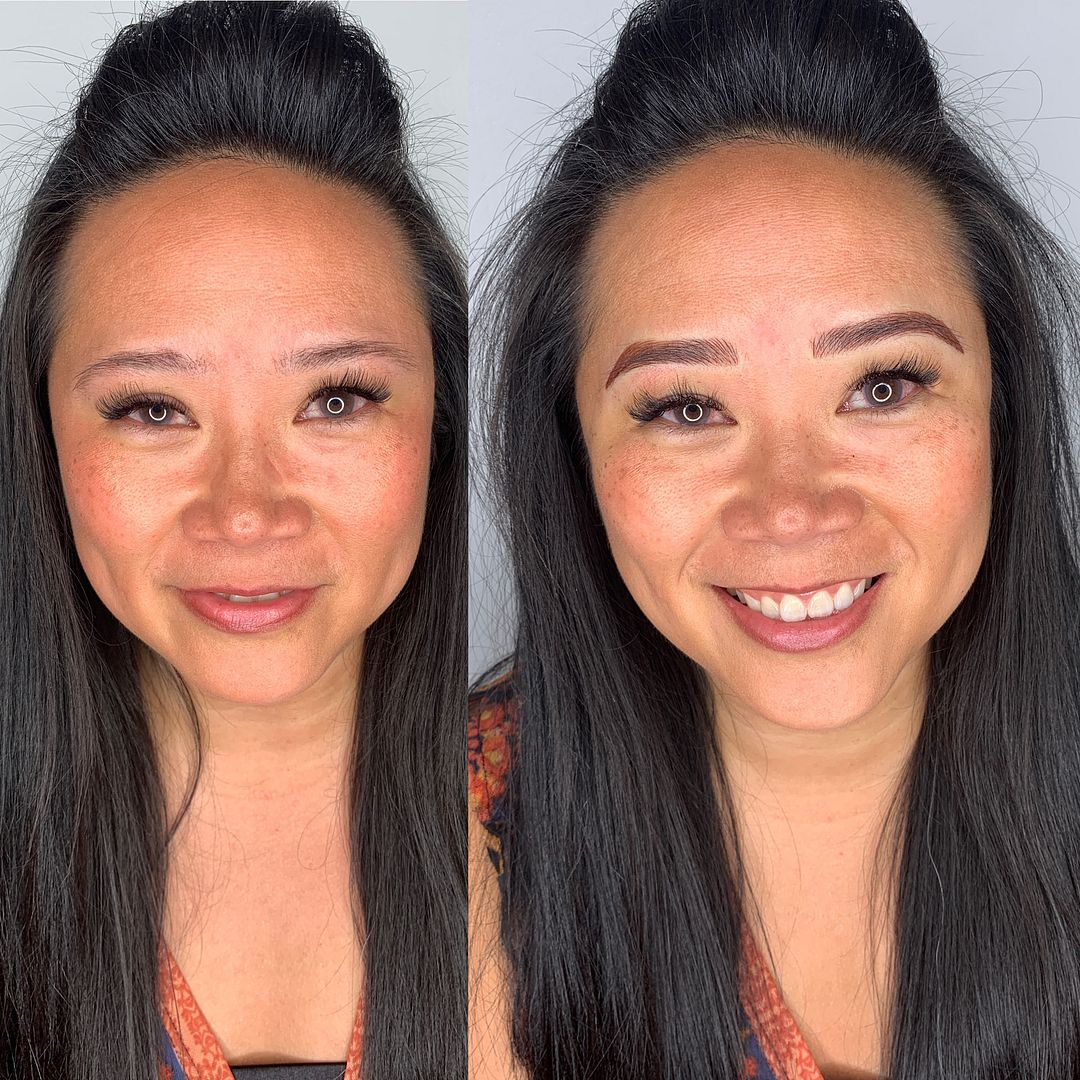
Before and after
Combo microbladed/machine shaded brows
Well, fast forward to last week, and she posted on social media about having a last minute opening! I luckily saw it 2 minutes after she posted, texted her immediately asking if I could move up my appointment, and SHE SAID YES. I legit jumped off the couch, danced around, and gave the husband a high five! But holy crap! I was getting brows!!! I've never had brows ever to be honest. They've always been sparse, but I only started filling them in back in 2004 - I remember because the first time I did it was for my sister's wedding. I never realized how much brows could really shape your face! Because my brows are so non-existent, I decided to do a combo brow - meaning a combination of microbladed strokes and machine shading. I've posted about my experience on Instagram (which you can see in my story highlights), and I've received so many questions and comments. I knew I needed to document it all via the blog. So here we go!
How long it takes and the morning of
Three hours was blocked off for my appointment and it really did take basically that whole time - two hours and 45 minutes to be exact. I had asked her if I should bother putting any makeup on and since she does a lot of wiping around my brows and forehead, she didn't really think it was worth the time for me to come fully made up. I was definitely going to leave my brows unfilled, and since I have my lash extensions anyway, I normally don't wear eyeshadow on a normal weekday. All I ended up putting on my face was some toner and a layer of tinted moisturizer. The only other thing she told me was to avoid coffee and alcohol the morning before my appointment as she didn't want me to have anything that would make my blood thin.
Face mapping and numbing
The first thing on the agenda was to take a before picture! She has an area with stools and a light for photos. Once in the room, she went over all the contradictions with me and a waiver for me to sign. Next step was the mapping of my face. She explained that your face looks different when you're sitting up vs. laying down, so first, she maps me while I'm sitting up right, then she placed an adhesive "ruler" on my forehead and did additional mapping as I laid down, then had me sit up one more time for one last round of mapping.
So what do I mean when I say, "mapping?" She has a piece of thread that she is holding tight in both hands. This acts as her straight edge. So, for example, she can place it in front of my face and see a straight line from one brow to the other. I imagined the thread to have chalk or something similar on it so that she can mark points on my face - a straight line from one brow to the other. A straight line from the center of my eye directly vertical which becomes the start of my new brows. She mapped the outside ends of my brow "tails" and of course the high and low of the arch and the curves that make up the arch.
She then drew the outline of each brow and showed me what they looked like so I could review and comment! She explained that the outline was just a guardrail - the thickness of the brows would extend up to the outline but not include the outline, so what I was seeing would be thicker than they would end up being in real life. She made a couple of tweaks based on my feedback and then it was time to start numbing!
Microblading strokes
There were two types of numbing creams she used on me - one for the microblading and one for the shading. The numbing cream she used before the microblading needed 25 minutes to set, so I laid there while we chit-chatted for a few (i.e. reminisced about how I've been coming to her for over 4 years now and how I couldn't live without her!!!)
When she started microblading my right brow, she left the numbing cream on the other brow. I was a little scared, not going to lie. I do have one tattoo that I got years ago, so I knew the sensation and couldn't imagine that same feeling on my face!! But she did her first stroke and I really didn't feel any sharp pains at all. I could definitely feel something was happening, and depending on where she was on my brow, I could feel a sting or two here and there, but nothing that made me flinch or cry out and nothing that was unbearable. Honestly, the sound was what freaked me out the most. It sounds much like when your dentist is scraping plaque off your teeth.... except more muted and very quick. So in my head I'm hearing the sound and picturing her slice my face open. BUT! It did NOT feel that way at all. Sorry if that freaks you out, but just had to share the real thought going through my head. Also, I despise the dentist and all sounds associated with that, so take that for what it's worth.
She microbladed my right brow once. Then she microbladed my left brow. She applied a second coat of numbing cream before doing a second round of microblading on each eye, which were more infill type strokes.
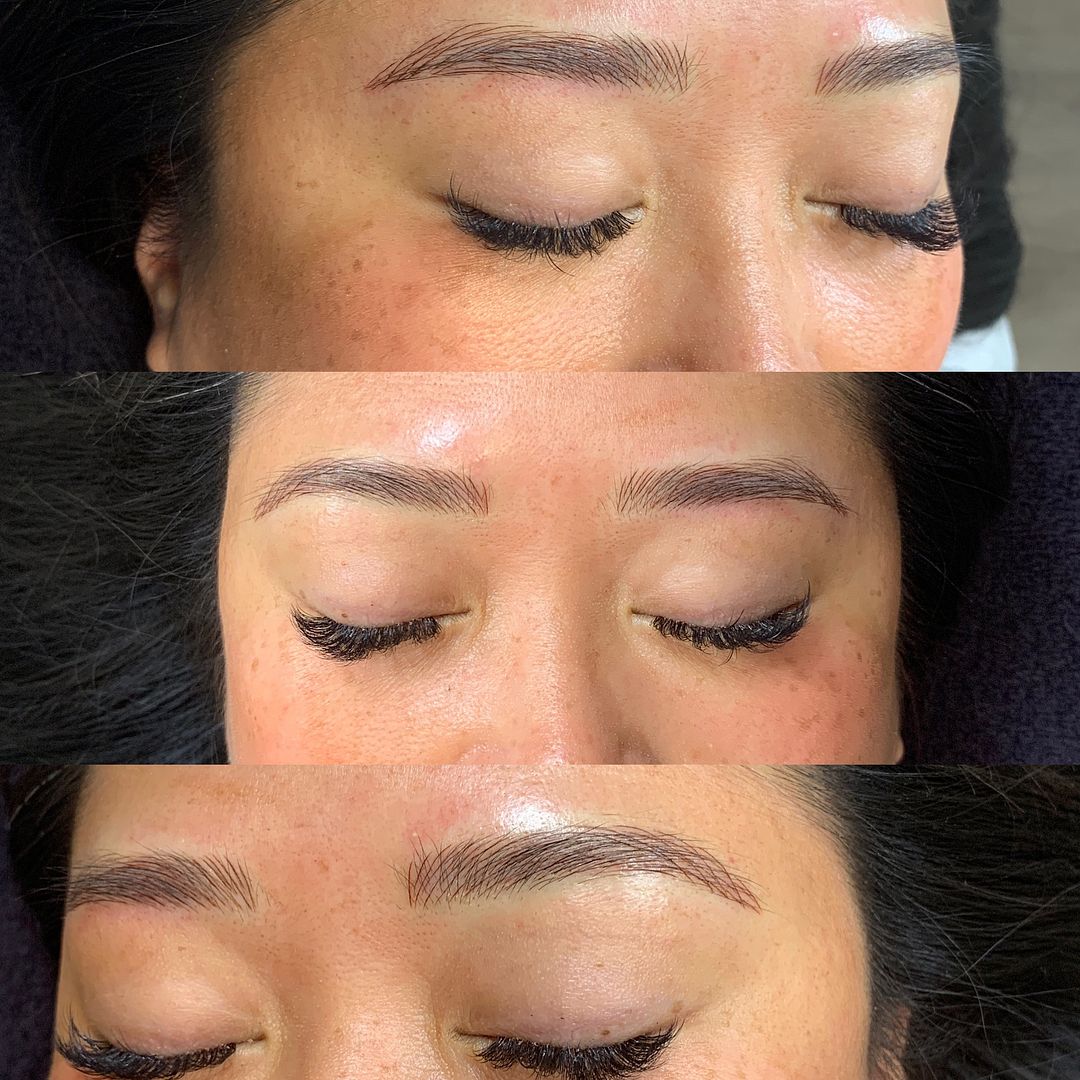
She let me see my brows when the microblading was complete and I was amazed. It looks so realistic and a part of me was thinking that I could have really stopped after that first step! But ultimately, I knew I would end up filling those brows in still, and if I'm going to spend the money, I should not have to do a thing to them every morning! One thing to note is that she left all of my natural brow hair in tact. Though she did clean up strays (peach fuzz) around the brows before she began.
Machine shading step
Next was the shading. The numbing she applied before the shading only took a minute or so to activate. The shading did not bother me at all. I felt pressure and vibrations, but I even dozed off a few times during this step. She started the shading from the outside tails of my brows in towards the center of my face.
You'll see in the "after" photo above of my right eye that it appears a little darker on the bottom center of the arch vs. the tallest part of the arch. This is because she "raised" my right brow to be more symmetrical to my left. As she was mapping me, she found that my right brow was lower than my left. So it's appearing darker on the bottom of the arch because there are no natural brow hairs where she applied the shading at the peak of that arch. This will be less conspicuous over time, and honestly, it took a bit for the husband to even notice any of that. I had to explicitly point it out and send him enlarged photos. Ha!
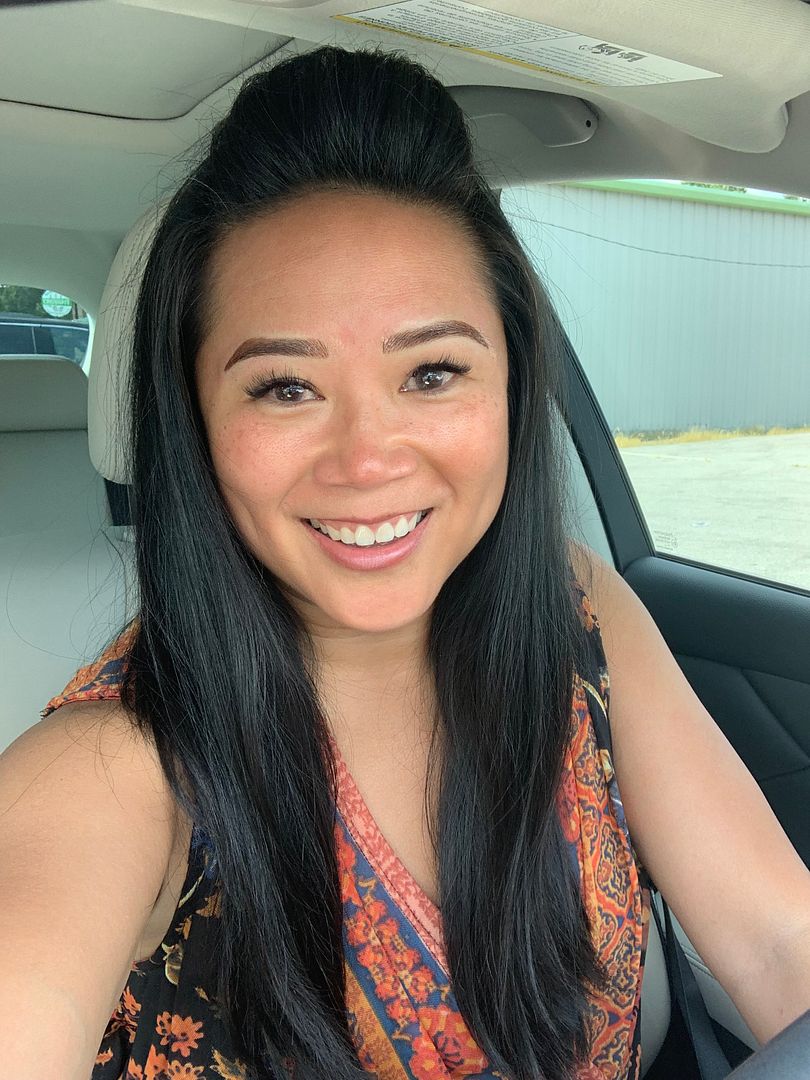
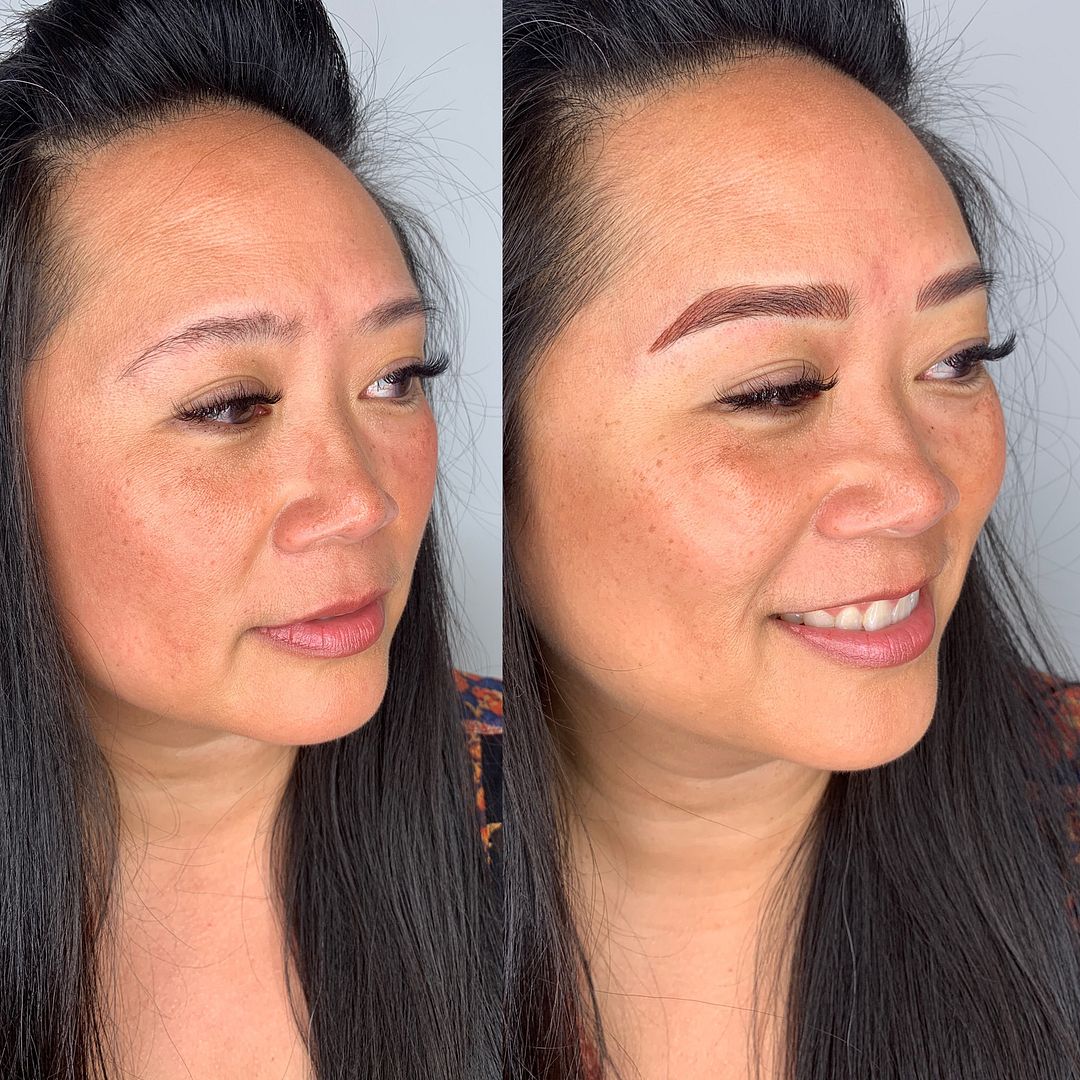
This is me in my car right after the procedure. It really is amazing how clean and fresh and NOT swollen they look right after. I will say that over the next few hours, they did appear more red and the tint of the brow is a more reddish brown than they will end up being when they are fully healed. I should have mentioned that, too. As I was numbing, she showed me the color chart for the ink and proposed the second darkest shade which was a dark chocolate brown. Even though my hair is black, she said she really wouldn't recommend the black ink on anyone's face. I used to always use a dark brown shadow to fill in my brows so I totally agreed with her recommendation to go the darkest I could without using black.
I was able to take a time lapse video of the entire 3 hour process. I had never used the time lapse feature on my iPhone camera before, so this was great! It condensed the 3 hours of work into a 35 second video. The parts that you can't see are the mapping. I wish I would have thought to take photos of what my face looked like when it was mapped!

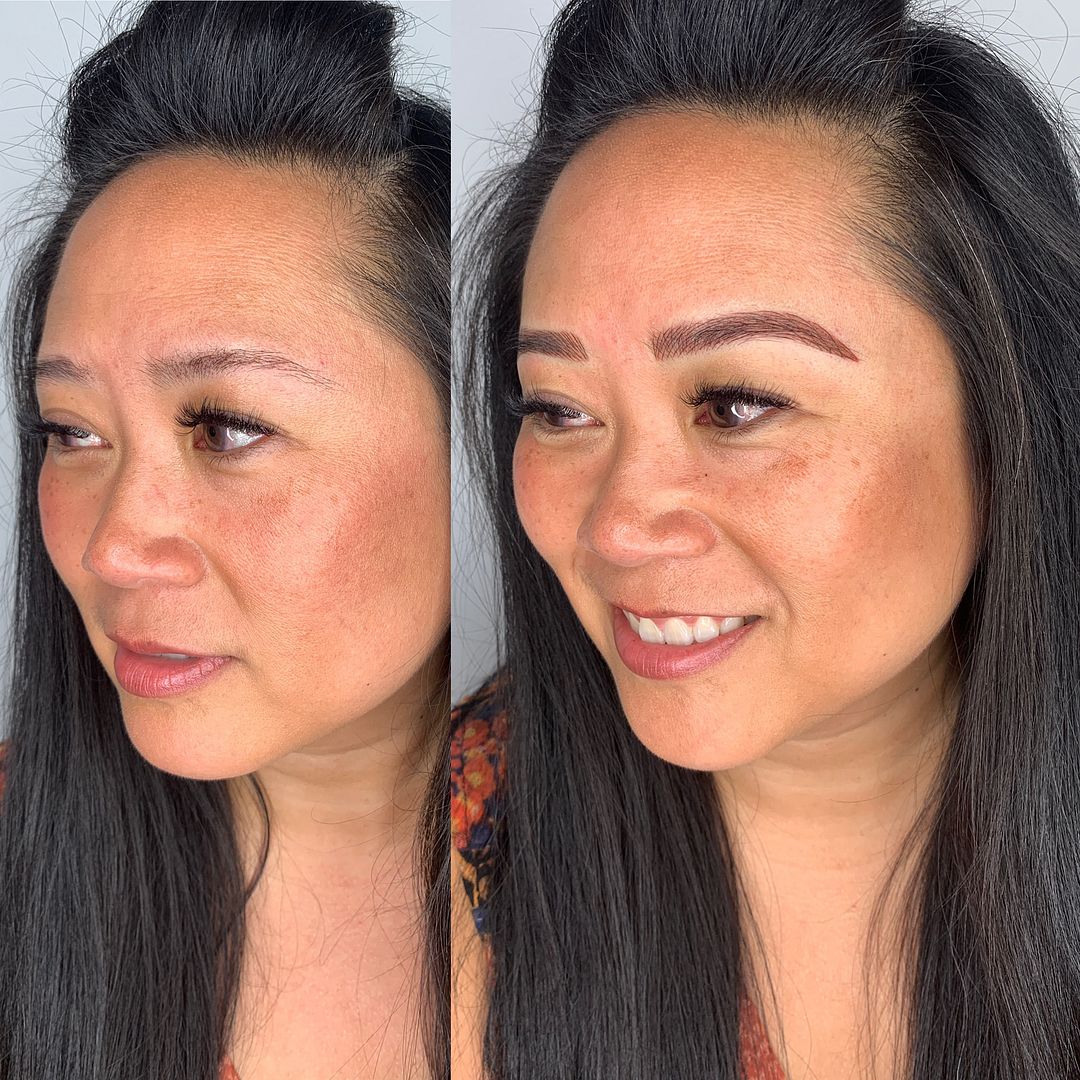
I had to post one more before and after type photo so you can see my "old" brows and how I used to fill them in next to my "new" brows. You can see how my right eye (shown on the left in both photos) is smaller than my left eye and that brow was naturally less arched than my left brow. Since she "raised" that brow arch, she really highlights my right brow bone more and visually "opens" my right eye. It's pretty amazing.
Two weeks of healing
I'm only on day 3. This first 7 days of healing, I'm not allowed to get them wet at all. That includes not doing any strenuous workouts so I don't sweat. They are darker and thicker than they will end up being over time. During the first few weeks, I will lose a bit of pigment and the strokes and shading will shrink just a touch. The second 7 days of healing I will need to apply a balm to the brows twice a day to keep them moisturized, and although I can get them wet during that second week, I still have to baby them a bit and pat them dry.
The touch-up appointment
I have one follow up appointment to go to - usually these are scheduled 4-8 weeks after the initial procedure. Mine isn't until October (the date my original procedure was supposed to happen), but she said it isn't a big deal that it's a little longer than 8 weeks away. From there, touch-ups should be made no longer than 2 years apart, otherwise, you're basically starting from scratch again.
How much it costs and closing thoughts
The usual cost for this combo brow is $425, but she gave me $100 off since I was able to take that appointment last minute. She let me move my appointment up by 3 months AND she gave me $100 off? Win/win.
I feel very fortunate that I have such a long standing relationship with Katie and I know without a doubt that she is completely skilled, knowledgeable, and commits herself to continuing education so she is always up to speed on new trends and techniques. She cares so much and she truly listens to you. There is definitely a reason why it is difficult to get an immediate appointment with her! I can't stress the importance of doing your research ahead of time and making sure you find someone who is licensed, reputable, and with whom you are comfortable! If the appointment is substantially quicker or cheaper than I'm describing in this post, honestly, I would be a little leery. My mom also wants her brows microbladed and I told her I would not want her to go to anyone else other than Katie! I'm flying her in from San Antonio for an appointment in October!! That's how much I trust this lady! I can't speak more highly of her!
I feel very fortunate that I have such a long standing relationship with Katie and I know without a doubt that she is completely skilled, knowledgeable, and commits herself to continuing education so she is always up to speed on new trends and techniques. She cares so much and she truly listens to you. There is definitely a reason why it is difficult to get an immediate appointment with her! I can't stress the importance of doing your research ahead of time and making sure you find someone who is licensed, reputable, and with whom you are comfortable! If the appointment is substantially quicker or cheaper than I'm describing in this post, honestly, I would be a little leery. My mom also wants her brows microbladed and I told her I would not want her to go to anyone else other than Katie! I'm flying her in from San Antonio for an appointment in October!! That's how much I trust this lady! I can't speak more highly of her!
Ok, I think that is everything! I will continue to post daily updates over the next couple of weeks on my Instagram stories, so check back here for that progress! I'm happy to answer any questions if you have them!


No comments :
Post a Comment